- 1. System Recommendation
- - Operating System : Windows 7, 8 , 8.1
- DirectX : Recommend Direct X version 9 or higher version
- 2. Installation Program List
-
- IP Installer (Network Camera Network Configuration program)
- NVR2 (Network Video Recorder program)
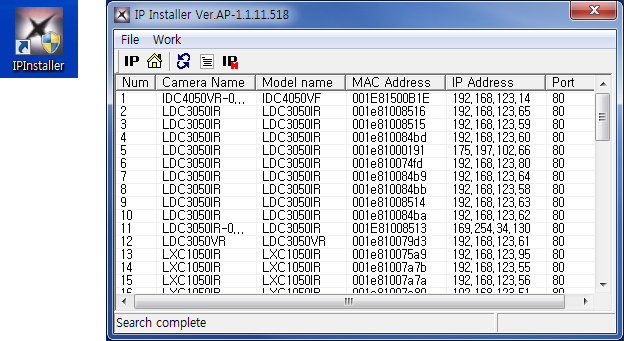
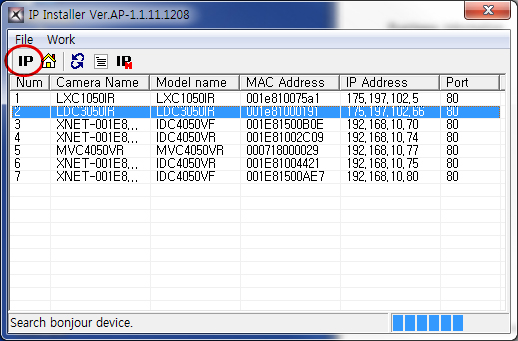
- 3. Network Camera IP Setting Procedure
- - Run IP installer to find a list of camera connected to a network
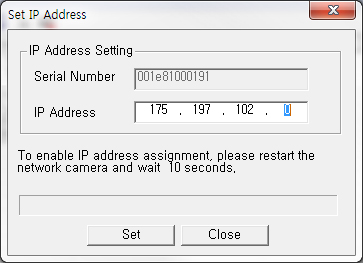
- To set an IP address, double-click a camera model name
- Type an IP address
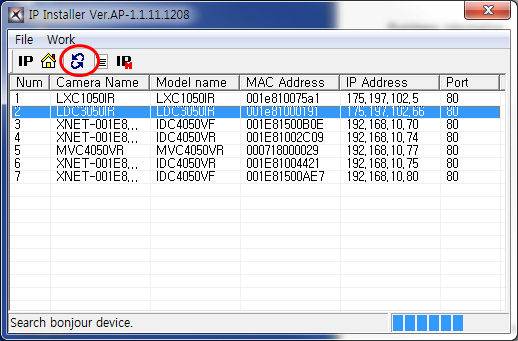
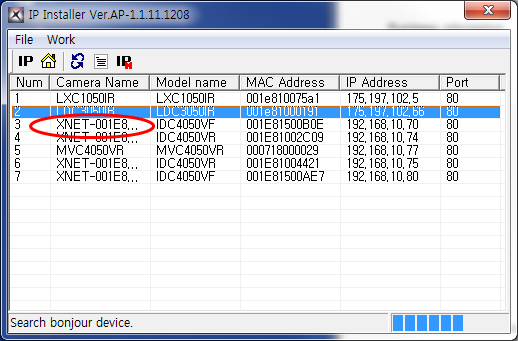
- Refresh the list to check if the IP address is changed
- 4. Network Camera Firmware Update Procedure
-
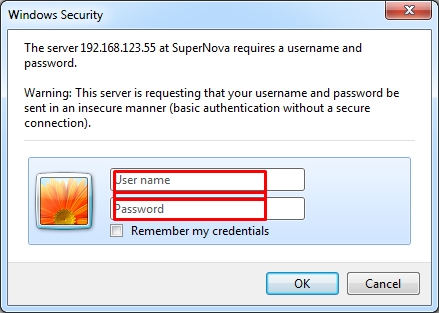
- Double-click a model name on the IP installer
- Enter user name and password on the web browser
(Default user name/password is root/admin)
- 5. How to update a firmware
-
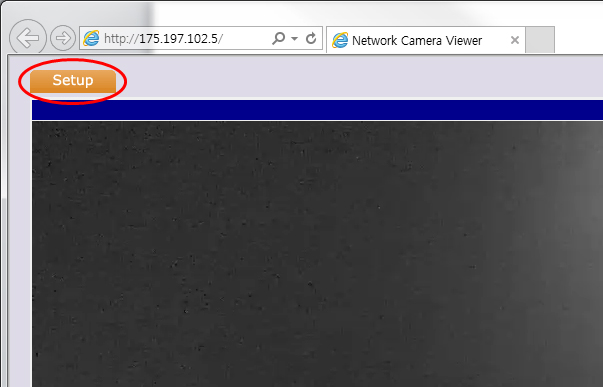
- On the web browser, click the setup button
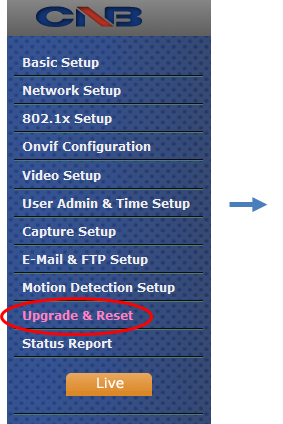
- Click Upgrade &Reset on the left hand panel
- Click search button of System Firmware Upgrade under Manual Upgrade menu
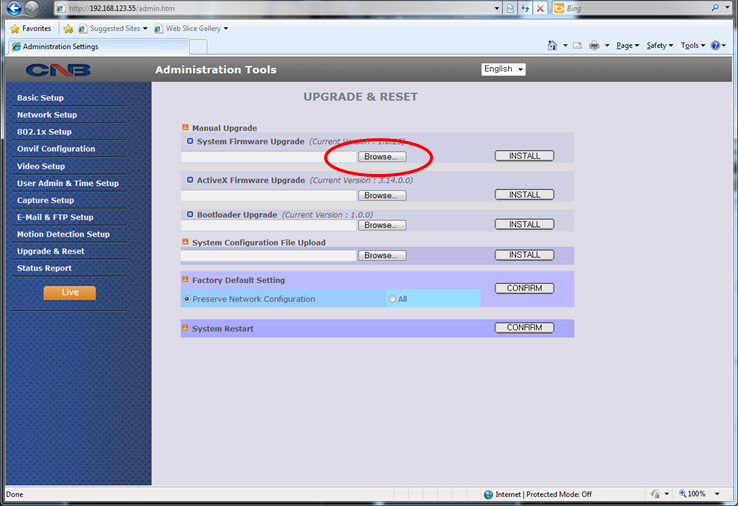
Choose a firmware from a computer. The firmware file has an “.ief” extension
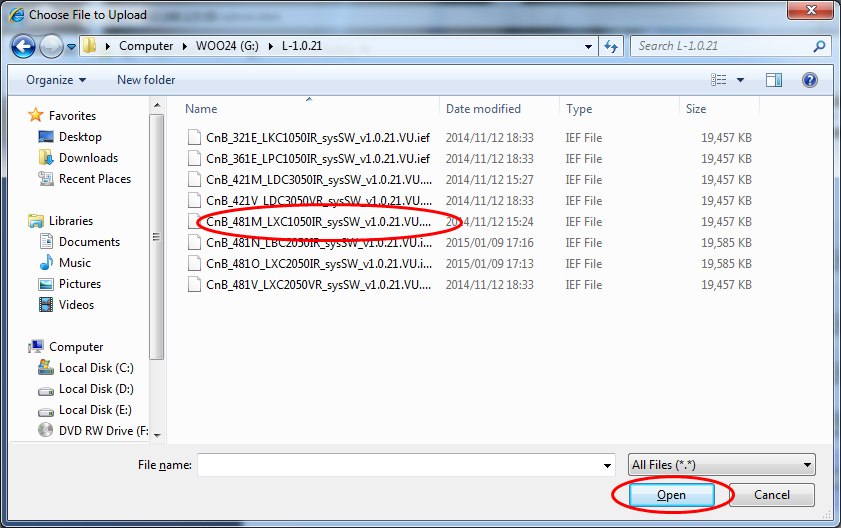
- Click INSTALL to upgrade a firmware

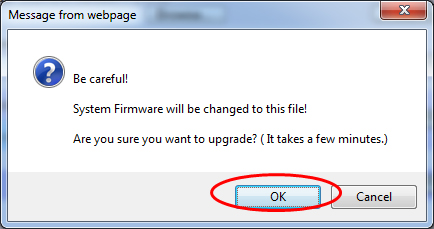
- To continue the firmware upgrade, click yes button
- When finished the upgrade, you will see below screen. Then, click BACK button.
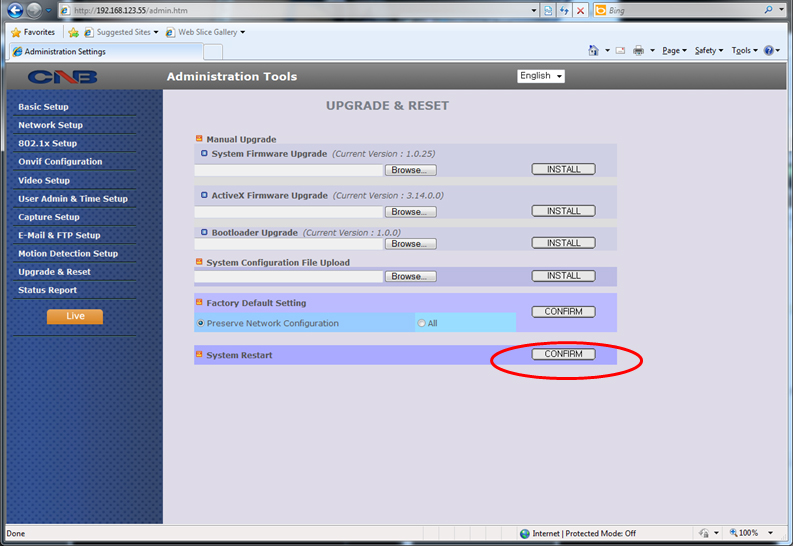
- Click CONFIRM under System Restart menu
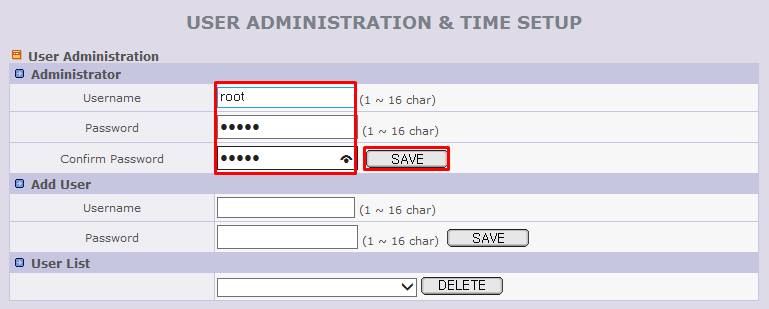
- 6. User account setup
-
- On the web browser, click the setup button
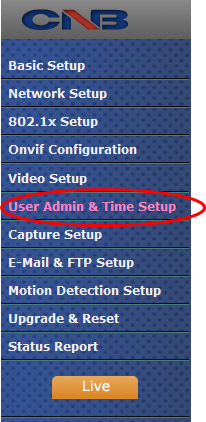
- Click User Admin & Time Setup on the left hand panel
- To add a new user, enter username and password. Then, click SAVE.

- To remove an user, select username then click DELETE
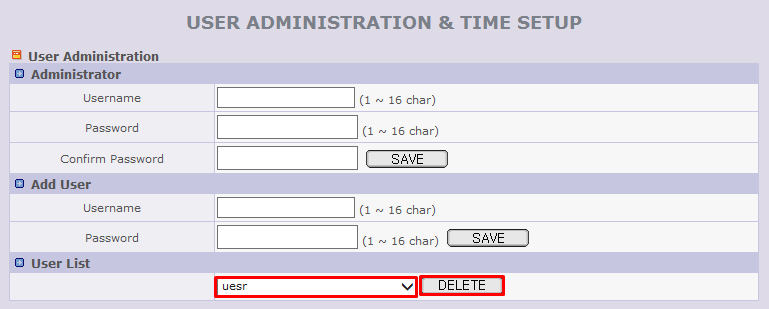
- To change an administrator password, enter username of root and enter new password. Then, click SAVE.
- To create new administrator account, enter username and password. Then, click SAVE.
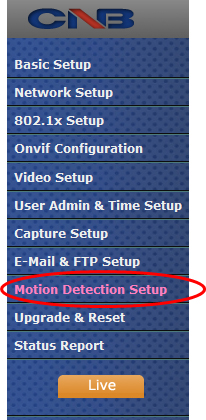
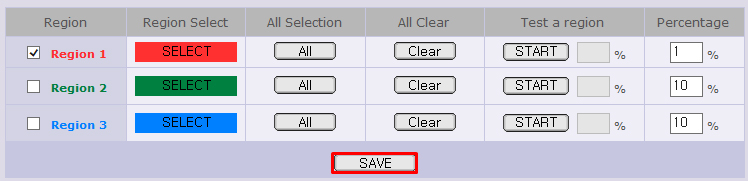
- 7. Motion Detection Setup
-
- On the web browser, click the setup button
- Click Motion Detection Setup on the left hand panel

- Select motion detection area by dragging a mouse on a screen.
- Select Channel Sensitivity from 1 to 10 (Default is 5).
- Click START button to test a motion detection area how much movement this area can detect by a percentage. Then, enter the percentage of sensitivity (Default is 50%).
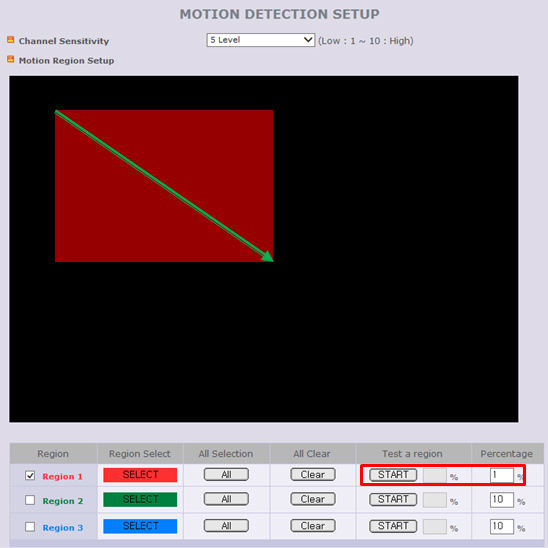
- Click SAVE to apply the setting.
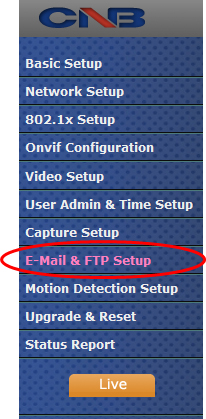
- 8. E-mail & FTP notification setup
- On the web browser, click the setup button
- Click E-Mail & FTP Setup on the left hand panel
- E-mail notification setup
. To activate the e-mail notification, enter your e-mail address to receive the notification
. Input SMTP server address and password of the e-mail account
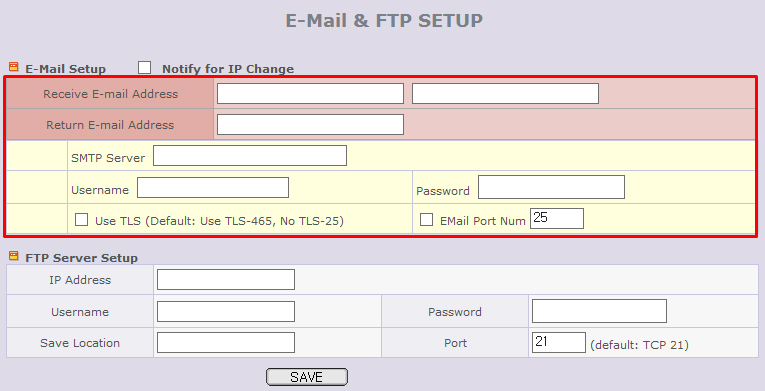
- FTP notification setup
. To activate FTP notification, enter FTP server address, username, and password.
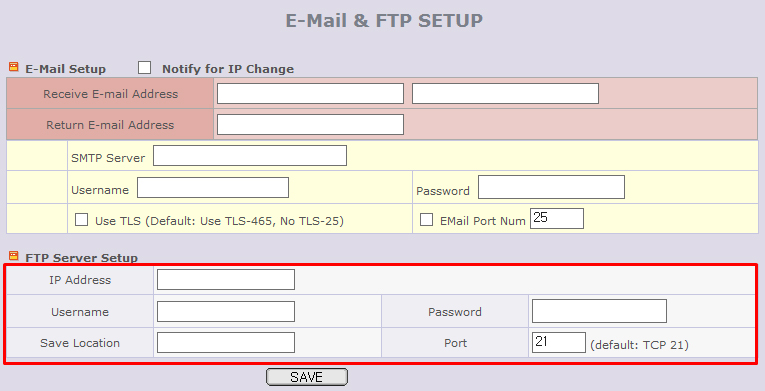
-Click SAVE to apply the setting of e-mail or FTP notification

- 9. DDNS Configuration
-
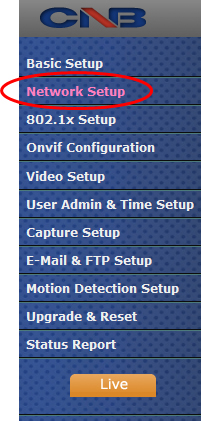
- On the web browser, click the setup button
- Click Network Setup on the left hand panel
- DDNS Setup
. To activate the DynDns, check Enable DynDNS box
. Set hostname
. To activate anonymous user, check the Enable Anonymous box
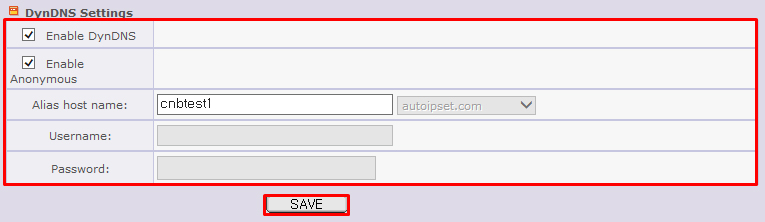
- Click SAVE to apply the setting
- 10. PTZ Configuration & Control
-
- This menu is only for PTZ camera
- PTZ control menu is on the right hand panel of live view

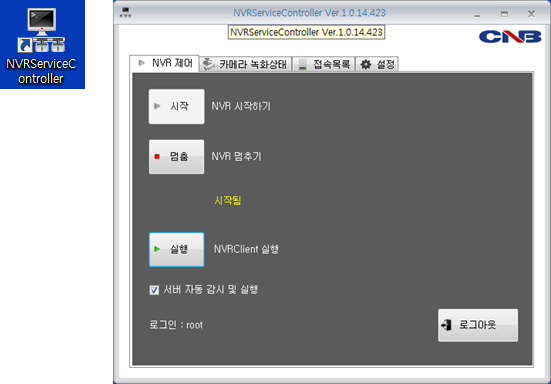
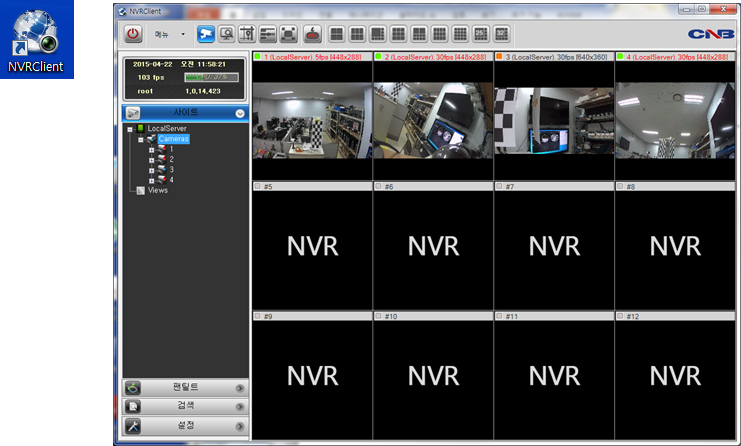
- 11. Connect to Network Cameras via NVR2 program
-
- On the web browser, click the setup button
- Click Motion Detection Setup on the left hand panel